Creating a mask around the segmentation
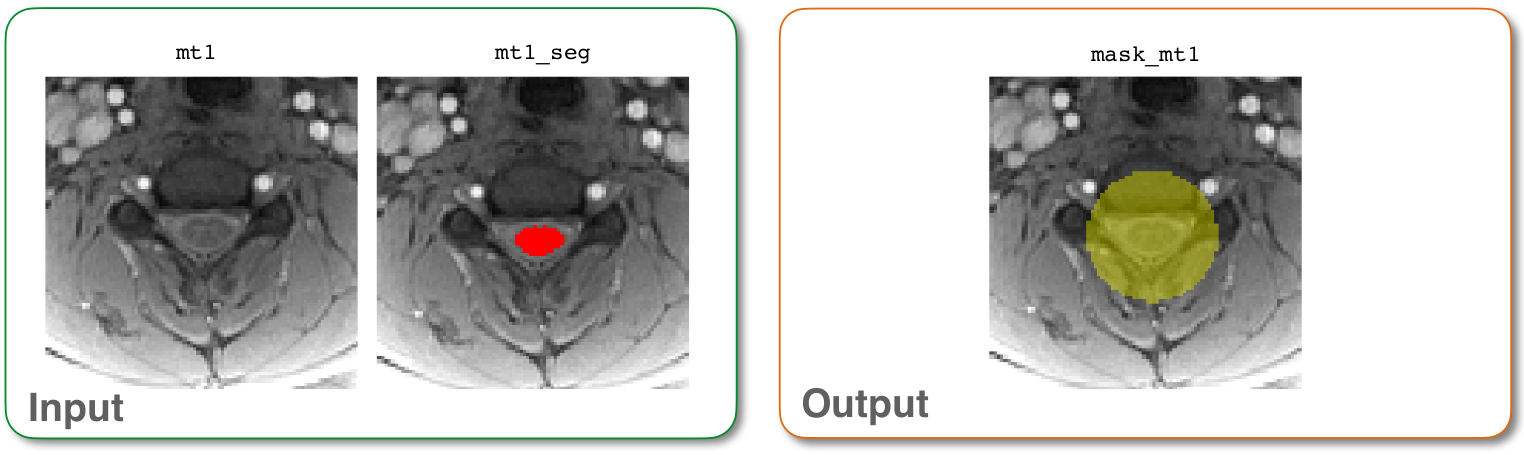
Next, we will create a binary mask to focus on the region of interest, which will increase the accuracy of the registration. Importantly, this mask is used to exclude the tissue surrounding the spinal cord, because it can move independently of the cord and negatively impact the registration.
sct_create_mask -i mt1.nii.gz -p centerline,mt1_seg.nii.gz -size 35mm -f cylinder -o mask_mt1.nii.gz
- Input arguments:
-i: Input image.-p: Process to generate mask. By specifying ‘centerline,mt1_seg.nii.gz’, we tell the command to create a mask centered around the spinal cord centerline by using the segmentation file ‘mt1_seg.nii.gz’-size: Size of the mask in the axial plane. (You can also specify size in pixels by omitting ‘mm’.)-f: Shape of the mask.-qc: Directory for Quality Control reporting. QC reports allow us to evaluate the results slice-by-slice.
- Output files/folders:
mask_mt1.nii.gz: 3D binary mask surrounding the segmented spinal cord.
Once the command has finished, at the bottom of your terminal there will be instructions for inspecting the results using FSLeyes.
Input/output images for sct_create_mask