Applying the registration algorithm
To apply the registration algorithm, the following command is used:
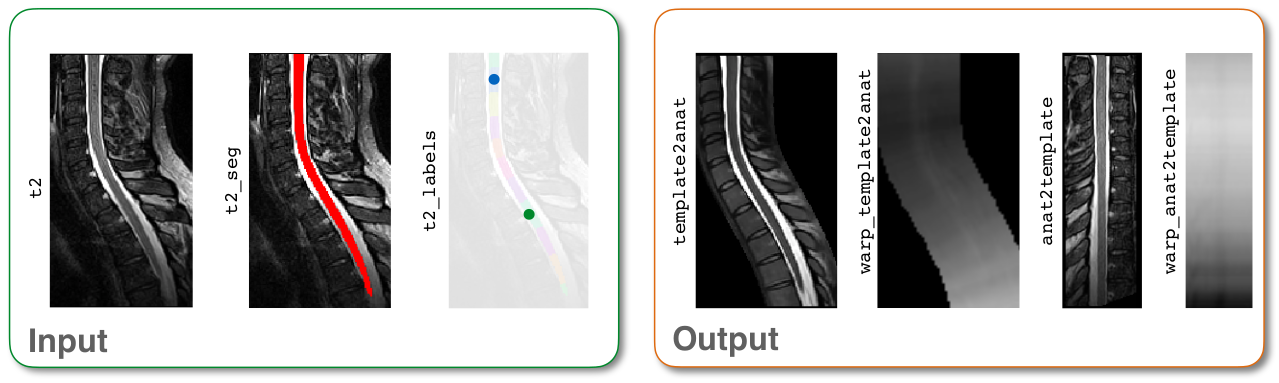
sct_register_to_template -i t2.nii.gz -s t2_seg.nii.gz -l t2_labels_vert.nii.gz -c t2 -qc ~/qc_singleSubj
- Input arguments:
-i: Input image-s: Segmented spinal cord corresponding to the input image-l: One or two labels located at the center of the spinal cord, on the mid-vertebral slice-c: Contrast of the image. Specifying this determines the version of the template to use. (Here,-c t2means thatPAM50_t2.nii.gzwill be used.)-qc: Directory for Quality Control reporting. QC reports allow us to evaluate the results slice-by-slice.
- Output files/folders:
anat2template.nii.gz: The anatomical subject image (in this case,t2.nii.gz) warped to the template space.template2anat.nii.gz: The template image (in this case,PAM50_t2.nii.gz) warped to the anatomical subject space.warp_anat2template.nii.gz: The 4D warping field that defines the transform from the anatomical image to the template image.warp_template2anat.nii.gz: The 4D warping field that defines the inverse transform from the template image to the anatomical image.
Once the command has finished, at the bottom of your terminal there will be instructions for inspecting the results using Quality Control (QC) reports. Optionally, If you have FSLeyes installed, a fsleyes command will printed as well.
Input/output images for sct_register_to_template