Generate the necessary input files
The sct_compute_compression command uses the shape metric of the spinal cord at the level of compression and computes a ratio with non-compressed levels above and below the compression site.
To use sct_compute_compression, we need the 3 following input files:
Spinal cord segmentation
Vertebral labels
Compression labels (
t2_compressed_label-compression.nii.gz)
These input files can be generated using the commands below. However, if you would like to save some time, you can also acquire the generated files directly by downloading data_normalizing-morphometrics-compression.zip.
1. Spinal cord segmentation
sct_deepseg_sc -i t2_compressed.nii.gz -c t2 -qc ~/qc_singleSubj
- Input arguments:
-i: Input image.-c: Contrast of the input image.-qc: Directory for Quality Control reporting.
- Output files/folders:
t2_compressed_seg.nii.gz: Spinal cord segmentation.
2. Label the vertebral levels
sct_label_vertebrae -i t2_compressed.nii.gz -s t2_compressed_seg.nii.gz -c t2 -qc ~/qc_singleSubj
- Input arguments:
-i: The input image file.-s: Spinal cord segmentation.-c: Contrast of the input image.-qc: Directory for Quality Control reporting.
- Output files/folders:
t2_compressed_seg_labeled.nii.gz: Spinal cord vertebral labels.
3. Label spinal cord compression sites
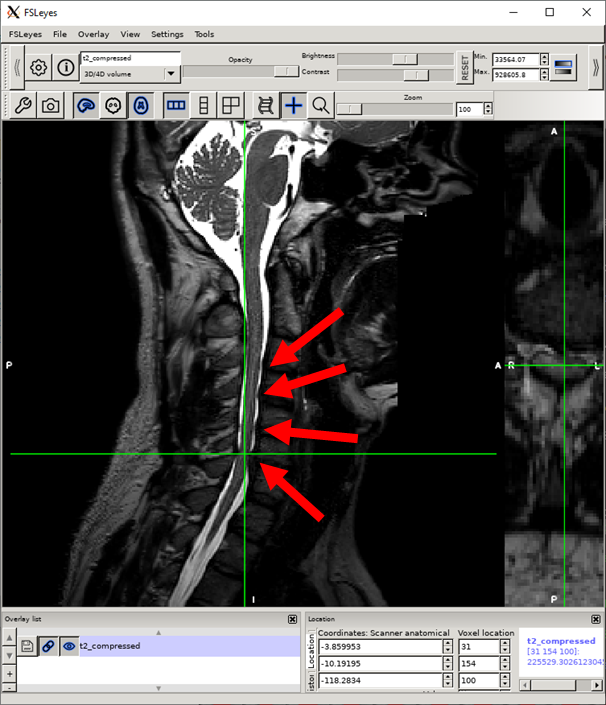
Open the image in FSLeyes (or your favorite viewer).
fsleyes t2_compressed.nii.gz &
If clinical data with information about compression level(s) is available, look at it to determine how many compressions a subject has and at which levels the compressions are located.
Locate the first compression site in the sagittal view. (The location does not need to be precise, as we will fine-tune the selection in the next step.) All 4 compression sites are indicated here.
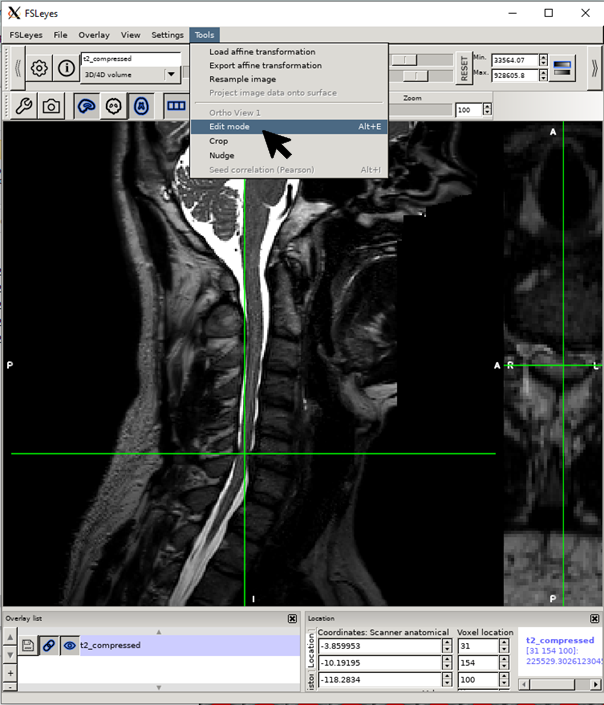
In the axial view, toggle to the maximum compressed slice around the compression.
Click on alt+E (Linux/Windows) or option+E (macOS) to open edit mode. Select size 1 and click on the pencil.
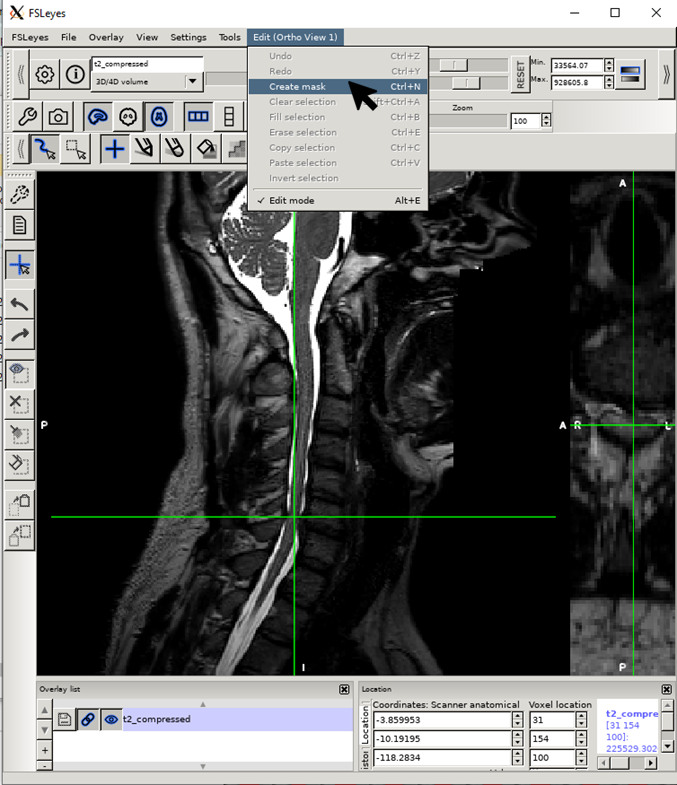
Create an empty mask alt+N (Linux/Windows) or cmd+N (macOS).
Place the label at the center of the spinal cord of the axial image.
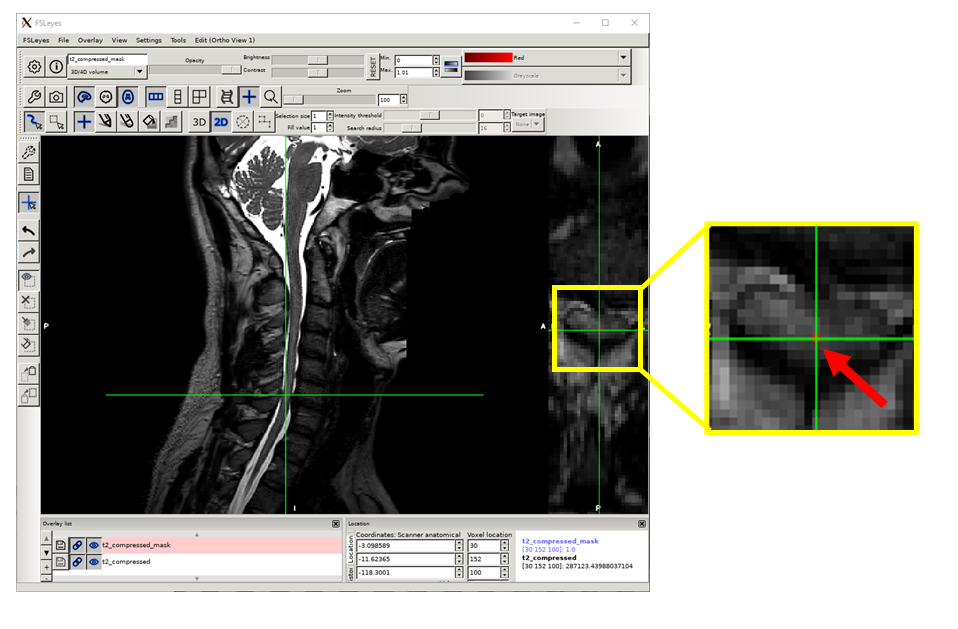
In the same mask, repeat steps 3, 4 and 7 for the remaining three compression sites.
Save with the filename
t2_compressed_labels-compression.nii.gzand quit.
If you need to label multiple patients, you can use the manual_correction.py script from the manual-correction repository; see the example here.